Growing Your Own Sprouts
Whatever the weather outside, you can always count on sprouts to give you a bounty of healthful, fresh food all year long right from your kitchen counter! Growing your own indoor sprout “garden” assures that you’ll always have sprouts on hand at the peak of freshness with maximum nutrition.
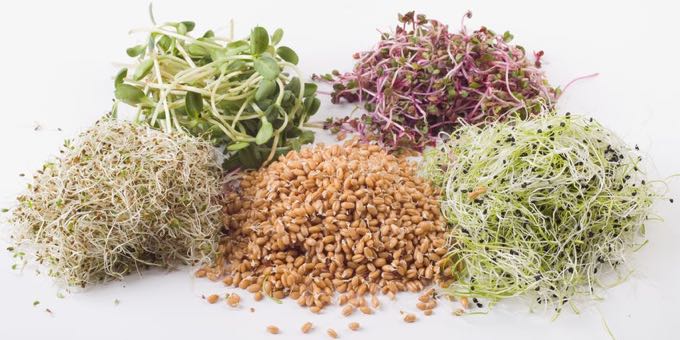
Botanical Interests sprouting varieties are certified organic, untreated, and tested at an independent laboratory to ensure that they have a high germination rate. Enjoy experimenting with the different flavors and textures. See specific varieties below.
Growing Sprouts using the Botanical Interests Sprouter
- Wash all sprouter parts with warm, soapy water and a soft cloth before first use.
- Although disinfecting sprouts is not necessary, if you choose to do so, visit our Sprouting Seeds at Home: Disinfecting, Growing, and Harvesting Tips article for instructions.
- Soak suggested amount of seeds in the base or separate bowl(s) (see table). Use enough water to cover the seeds about three times their depth soaking for 8-12 hours then drain and rinse seeds.
- Insert tray divider, if desired, and spread seeds evenly in a single layer in the tray. Seeds will expand when wet, and will occupy approximately four times their initial volume; don’t overfill because it reduces critical air-circulation. Stack additional growing tray as needed and repeat.
- Add water-diffusing lid to top of tray. (Avoid stacking anything on top of the lid that may reduce air flow.)
- Place tray in a warm area, ideally 70°F, out of direct sunlight. Mung beans are the exception and should be grown in darkness for best flavor.
- Rinsing at least twice daily with lots of water is the key to growing sprouts successfully. We recommend holding your seed trays with lid in place, over the kitchen sink without the base and running at least 6 cups of cool water through the water-diffusing lid before replacing on the base to drain. Or, you can place your trays on the base and pour 2 cups of water at a time through the diffusing lid. Empty base after each rinsing. Repeat at least three times.
- Empty the base when the growing trays are completely drained or before the next rinsing. Wash the base as needed with soapy water and a soft cloth.
- Sprouts are ready in approximately 2 to 10 days. Temperature can affect the days to harvest, so also look for the visual cues indicated in the table below.
- Store sprouts in the refrigerator to maintain freshness. The Botanical Interests Sprouter is also great for storing sprouts in your refrigerator. Sprouts may also be stored in a sealed container like a jar, but should be dry to the touch before storage since these options do not have drainage.
Sprouting in Another Container
Be sure the container is easy to clean, sanitize, and drain. A glass jar with a screen lid is a common solution. Follow the steps above, but choose the amount of seeds based on giving seeds enough room to expand four times their original size, still be in a single layer, and have good airflow. In order to rinse seeds in a jar, fill the jar several times with cold water, draining it thoroughly through the screen top.
Sprout Seed Safety
To ensure you are purchasing the safest possible sprouting seeds, a sample from each seed lot we receive is sent to an independent laboratory where it must test negative for foodborne pathogens including E. coli, Salmonella, Listeria, and Staph. For maximum safety, it is recommended that you disinfect the outside of your seeds and your sprouting container prior to sprouting.
Source information and seed sprouting choices from Botanical Interests.