COOKING FRESH PUMPKIN FOR BAKING
Have you wanted to make your own pumpkin for baking? It’s not as hard as you might think and can be frozen to use throughout the year.
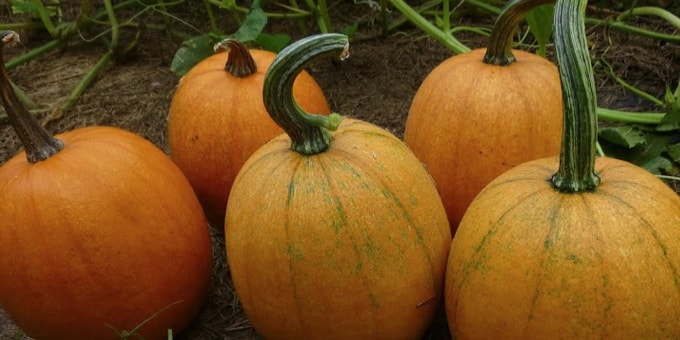
Begin by choosing the right kind of pumpkin. You may actually cook with any kind of pumpkin, but starting out with a sugar pumpkin, or pie pumpkin will get you more with less work. Pie pumpkins are smaller and more squat in shape and hopefully labeled as a baking, pie, or sugar pumpkin. They tend to have a drier flesh with thicker walls than one you would use for decorating or carving.
You will also want to make sure that the pumpkin you are choosing is completely orange all over. The color is how you will know it’s ripe and will give the best flavor. Since pumpkins can keep a few months as long as they are stored in a dry, cool place where there is no danger of freezing, you may give them a little time as they will have a better flavor as they age.
PUMPKIN PREPPING
- Wash the pumpkin all over and dry it off so it’s not slippery.
- Line a large, heavy baking sheet with parchment paper, and set your oven to around 400º.
- Knock off the stem by hitting it with something heavy, or tapping it against the counter. Discard the stem.
- Using a large, sharp chef’s knife, cut your pumpkin in half from top to bottom. Make sure not to have more than about 1/3 of the knife into the pumpkin or it may tend to get stuck.
- Once cut, use a large spoon to scoop out all of the seeds*, then lay the halves with the cut side down on the baking sheet you prepared.
*If saving seeds for later use or roasting, immerse seeds in water after removing for easier cleaning later.
BAKING, PUREEING & DRAINING
You may bake as many pumpkins at a time as your oven can manage and have baking sheets for.
- Bake for 45 minutes to an hour, or until a sharp knife easily pierces the side once you get past the skin. Of course, larger pumpkins may take a little longer to bake and smaller ones less.
- When done, carefully turn the halves over to allow quicker cooling. Cool enough to handle comfortably, but the next step is easier if they’re still on the warm side.
- Scoop out all the cooked pumpkin being careful to not get any of the skin – which isn’t tasty at all.
- Place cooked pumpkin in a food processor, food mill, or even an immersion blender until you end up with a very smooth and uniform puree. You will notice that you have liquid that needs to be drained.
- Cover a bowl with large mesh strainer over a bowl that is small enough in circumference to keep the bottom of the strainer raised so the liquid has a place to collect.
- Put pureed pumpkin in the strainer and let gravity do the work – which may take some time. To speed up the process you can lay plastic wrap over the pumpkin, add a small plate on top and weigh it down with some cans. This process can take at least an hour or two.
- After an hour take off the weights and stir, then replace the plastic wrap, plate, and cans back on top until it stops dripping. Save the liquid if you like for use in a vegetable or bean soup recipe.
Your pumpkin can be used right away, or stored in the refrigerator for 2 or 3 days, or you can freeze it to use later on in the year.
FREEZING
- Package up in about 1 pound amounts. Use freezer bags or freezer containers (if using containers, add wax paper, plastic wrap or parchment paper over the top surface to avoid freezer burn) for keeping for later use.
- Your pumpkin will keep for about a year in the freezer.
- When thawing for use, place in a mesh strainer as there is usually some liquid separation after thawing.
Can’t wait to try your fresh pumpkin in a recipe? A longstanding favorite around here is Pam’s Pumpkin Rolls – get the recipe!